

hi in this article. I will show you how to create a multi-bootable USB from iso with ventoy in ubuntu and windows
Introduction
In this article. I will show you how to install ventoy in windows and Linux with gray web UI and command-line methods. let's talk a little about ventoy it's an open-source tool to create a bootable USB drive for iso files with ventoy you don't need to format the disk over and over you just need to copy the iso files to the USB drive and boot them directly. ventoy presents a grub menu listing the ISO images present on the USB drive from where you can choose which one to boot and start using it right away. ventoy provides legacy bios and UEFI with and without secure boot MBR and GPT partition tables. also, it is possible to transfer the iso files larger than four gigabytes in size which makes it kind of universal. it supports most types of OS windows Linux UNIX VMware etc. the application is available for Microsoft Windows and Linux.
Download Ventoy
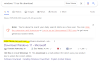
Step1: let's start by downloading ventoy from
ventoy.net click on downloads. I use ubuntu 2104.
Step2: I will download the Linux version.
Download Ventoy
from the website: Click Me
To Visit

Step3: After that will redirect to. Download and save
the file.

Step4: Extract the file downloaded

Step5: open the folder.
Install Ventoy into USB disk on Ubuntu – GUI mode.
Step6: to use ventoy with GUI mode run the shell
script ventoy
sudo ./VentoyGUI.x86_64

Step7: make sure the USB drive is connected.
Step8: click install.

Step9: that USB drive will be formatted and all the
data will be lost after installation.

Step10: you just need to install ventoy once after that all the things needed are to copy the iso files to the USB you can also use it as a plain USB drive to store files and this will not affect ventoy's function. after the installation is complete you just need to copy iso files to this partition.

Copy the ISO into a USB disk
Step11: you need to open the file manager as root and put
sudo nautilus
nautilus as the file manager on ubuntu gnome.

Step12: now, I will create a directory iso and I will
copy the iso files to the USB disk.

Step13: ventoy will search all the directories and
subdirectories recursively to find all the image files and list them in the
boot menu alphabetically.
Step14: I will copy the windows 10 iso file. And past it into my USB drive.

Install ventoy into USB disk on Ubuntu-Command Line Mode
Step15: now ventoy is installed in the USB disk. I
will show you how to make that with the command line web UI and on windows to
use ventoy on the command line and run the shell
sudo ./ventoy2Disc.sh

Step16: Check your USB disk mine is, /dev/sdc

Step17: Run the shell script as a root
sudo ./ventoy2dDsc.sh -i
/dev /sdc
for this example, my USB disk is /dev/sdc change sdc with
your USB device

Install ventoy into USB disk on Ubuntu – web UI Mode
Step18: to use ventoy with web UI run the shell script
as root,
sudo ./ ventoyweb.sh

Step19: open your browser and visit 127.0.0.1 colons
24680 then click install.

Install Ventoy into USB disk on Windows
Step20: to use ventoy with windows download the windows version from the website.


Step21: decompress it.

Step22: run ventoy2disk.exe.
Step23: Select the device and click the install or update button.

Test the Multi Bootable USB
Step24: now your ventoy bootable USB drive is ready
to use boot your system with a newly created bootable USB drive. we will test to
boot from the iso file with UEFI and legacy bios.
the boot menu key
of your computer below in is a list of common boot keys associated with a brand
The list of common boot keys associated with a brand:
|
Asus |
:
F8 or Esc |
|
Acer |
:
F12, F9, or Esc |
|
Compaq |
:
F9 or Esc |
|
Dell |
:
F12 |
|
eMachines |
:
F12 |
|
Fujitsu |
:
F12 |
|
HP |
:
F9 or Esc |
|
Lenovo |
:
F8, F10 or F12 |
|
Samsung |
:
F2, F12, or Esc |
|
Toshiba |
:
F12 |
Step25: the images will then be listed on your boot
menu and you will choose the one that you wish to use. select the OS that you
wish to install then proceed with the installation.

Thanks for reading this article. let me know what you think
of this article in the comments make sure to share it with your friends.


0 Comments